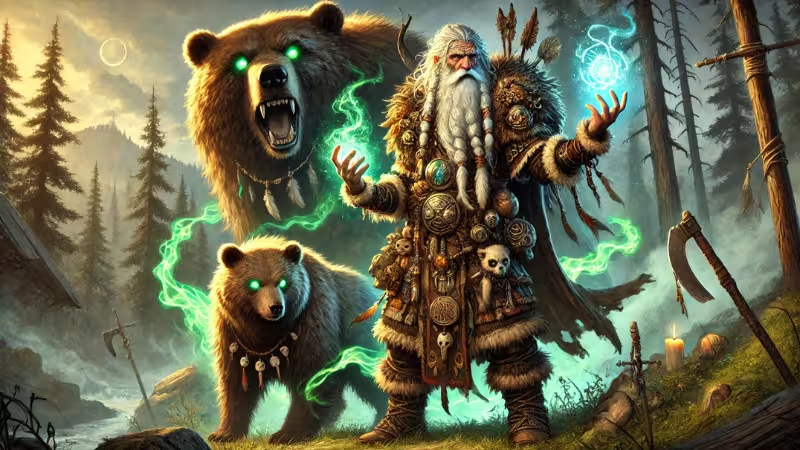
Lone Druid in Dota 2 is not one unit. It is Sylla and a Spirit Bear that fight as a pair. You manage two health bars, two positions, and two item inventories. When it works, you pressure lanes, take towers fast, and win fights through control and sustain.
This guide explains how Lone Druid works, what each ability does, and how to play around the hero’s biggest risks. It sticks to the mechanics and details described in the source material.
Table of Contents
What Makes Lone Druid Different
Lone Druid’s core is the Spirit Bear. The bear can equip items and levels up alongside Sylla. Each hero level gives the bear bonus health and attack damage, so both units scale together.
The pair plays like two linked heroes. You can keep Sylla safer while the bear fights, or bring both into the same fight to overwhelm targets. The strength comes from flexibility. The weakness comes from control. If the bear dies at the wrong time, Lone Druid loses momentum.
Roles and Basic Game Plan
Lone Druid fills three roles: Carry, Pusher, and Durable. The pushing power comes from Demolish and early bear strength. Towers fall quickly when the bear is left unchecked.
Durability comes from Spirit Link and True Form. These tools add armor, health, and sustain that allow Lone Druid to stay active on the map. Carry impact depends on item choices and clean control of both units.
Abilities That Define Lone Druid
Summon Spirit Bear
Summon Spirit Bear creates Lone Druid’s companion. The bear can equip items and has its own abilities. The summon is permanent, and later casts refill or revive the bear.
The bear cannot attack if it moves more than 1100 units away from Lone Druid. It becomes disarmed until it returns to range. This restriction is removed when Lone Druid has Aghanim’s Scepter.
If the bear dies, Lone Druid takes pure backlash damage equal to 20% of his max health. The bear also gives gold and experience to the enemy. This makes positioning and retreat timing critical.
Spirit Link
Spirit Link connects Lone Druid and the Spirit Bear. Both gain attack speed, share a portion of their armor, and damage dealt by the bear heals Lone Druid.
Break disables the shared lifesteal but does not remove armor sharing or attack speed. The link cannot be dispelled and persists through death.
With Aghanim’s Scepter, Spirit Link can be cast on an allied hero. The ally gains the bonuses for a short duration, and damage dealt by either unit heals the other. If the Spirit Bear does not have its own Scepter, it is feared back to the fountain during this effect.
Savage Roar
Savage Roar causes Lone Druid and the Spirit Bear to roar at the same time. Enemies in range are feared and forced to run toward their base. Their movement speed increases while feared.
The ability partly pierces debuff immunity. Immune enemies are not feared but still gain movement speed. Savage Roar interrupts channeling abilities and Town Portal Scrolls.
Aghanim’s Shard upgrades Savage Roar to also apply a basic dispel and grant attack speed and movement speed to nearby allies.
True Form
True Form turns Lone Druid into a melee bear. He gains bonus armor and a large health increase but loses ranged attack.
The transformation cannot be interrupted. If Lone Druid dies during the transformation, the cooldown resets. If he dies while True Form is active, he respawns still in bear form.
True Form grants Lone Druid access to Demolish and Entangling Claws based on the Spirit Bear’s level. It is not disabled by Break.
Spirit Bear Abilities and Why They Matter
The Spirit Bear is a creep-hero unit with its own inventory. It can use most items and activate most runes. It cannot place wards or pick up Aegis.
Return
Return channels for three seconds and teleports the bear back to Lone Druid. It is the primary tool for saving the bear and resetting positioning.
With Aghanim’s Scepter on Lone Druid, the bear can attack at any range and survives if Lone Druid dies.
Demolish
Demolish increases the bear’s damage to buildings and grants bonus magic resistance. Break disables the magic resistance but not the building damage.
This ability is the main reason Lone Druid pressures towers so early.
Entangling Claws
Entangling Claws gives the bear a chance to root enemies on attack. Rooted targets cannot move and take damage over time. The effect also provides True Sight.
Break disables Entangling Claws. Illusions cannot use it.
Fetch (Aghanim’s Shard)
Fetch allows the Spirit Bear to drag a target toward Lone Druid. Enemies take damage during the pull and are rooted for the duration.
The ability can be interrupted by death, teleports, or higher-priority forced movement effects. When it completes, it creates strong positioning advantages.
Playing Lone Druid Without Feeding the Bear
Respect the Bear’s Death Cost
The Spirit Bear is worth real gold and experience. Losing it also hurts Lone Druid directly through backlash damage.
When fights turn bad, pull the bear out first. Use Return when safe. If the bear is about to die, transferring items to Lone Druid can reduce losses.
Keep Both Units in Range
If Lone Druid moves too far ahead, the bear becomes disarmed and loses impact. This often happens during chases.
Move Lone Druid first, then command the bear. Keep both units active in fights instead of splitting them by accident.
Use Savage Roar With Intent
Savage Roar is not only an escape tool. It splits enemy positioning and interrupts key actions.
Combining Entangling Claws with Savage Roar often removes a target from the fight entirely.
Transform Before Contact
True Form has a short transformation time where Lone Druid cannot act. Using it too late allows enemies to punish you.
Transform before fights start or as soon as danger is clear.
Item Direction and Build Focus
Item choices on Lone Druid work best when they follow a clear plan. The Spirit Bear is usually the main recipient of gold, while Lone Druid supports through positioning, abilities, and selective item use. Spreading items evenly across both units often weakens mid-game impact.
Starting Items
Iron Branch is a strong opening choice for both Lone Druid and the Spirit Bear. It provides cheap stats and early damage, and filling empty slots early improves lane efficiency for both units.
Orb of Frost gives reliable slow on attacks and works on either Sylla or the Spirit Bear. When placed on the bear, it helps keep enemies in range long enough for Entangling Claws to trigger.
Quelling Blade belongs on the Spirit Bear. The bonus damage against creeps improves last-hitting and early lane control, especially against melee opponents.
Early Game Sustain and Mobility
Tango should be purchased as needed to stay healthy in lane. Consuming Iron Branch trees increases the healing value and helps stretch early resources.
Boots of Speed are important early. The first pair can go on Lone Druid to keep distance from pressure, or on the Spirit Bear to improve harassment and chase potential. This choice depends on lane matchup and threat level.
Early Spirit Bear Items
Boots of Speed on the Spirit Bear can stay unupgraded for a short time or be turned into Phase Boots quickly. Phase Boots help the bear close distance and stay on targets during fights.
Oblivion Staff is a common early pickup that later builds into Orchid Malevolence and Bloodthorn. It supports aggressive play and punishes heroes that rely on spells to survive fights.
Diffusal Blade helps solve one of the bear’s biggest problems: mobile enemies. The slow and mana burn make it easier to stay in range for roots and pressure heroes that depend on mobility.
Core Items on Lone Druid
Power Treads are optional on Lone Druid. In many games, simple boots are enough until later upgrades. Lone Druid often avoids heavy item investment so gold can flow to the bear.
Wraith Band is useful early and can be transferred to the Spirit Bear later. This keeps early stats relevant without wasting value.
Orb of Corrosion also transitions well to the bear. The slow and armor reduction improve early fighting and pushing.
Aghanim’s Shard changes how Savage Roar functions. It turns the ability into a dispel and team buff, making it harder for enemies to kite and easier to disrupt ganks, teleports, and channeling spells.
Core Spirit Bear Items
Phase Boots remain the standard mobility item. The active synergizes well with Diffusal Blade, Mask of Madness, and Entangling Claws by keeping enemies within attack range.
Orchid Malevolence allows the Spirit Bear to shut down spellcasters and isolate targets. Bloodthorn builds from Orchid and adds true strike and burst damage, making it effective against evasive heroes.
Skull Basher adds reliable control during fights. It helps lock down targets once roots trigger. Abyssal Blade upgrades Basher and adds a strong active stun for late-game fights.
Disperser upgrades Diffusal Blade and improves both chase and dispel utility, giving the bear more control in longer engagements.
Situational Items
Butterfly increases Lone Druid’s damage and gives evasion against physical carries. It fits games where Sylla becomes more involved in fights.
Aghanim’s Blessing allows the Spirit Bear to attack without Lone Druid nearby or alive. This is especially useful for split pushing and applying pressure across multiple lanes.
Situational Spirit Bear Items
Mask of Madness increases attack speed, leading to more Entangling Claws procs and faster building damage. It works best when the bear is already hard to kill.
Echo Sabre offers cost-efficient damage and helps the bear stay on targets through Echo Strike. Harpoon upgrades Echo Sabre and adds a gap-closing active.
Maelstrom is an alternative to Orchid when farming speed matters more than control. It pairs well with the bear’s attack speed and helps clear waves and camps.
Desolator stacks well with Demolish, allowing the Spirit Bear to tear through towers quickly.
Mjollnir improves attack speed and damage while adding wave-clear. Static Charge benefits from the large health pools of both True Form Lone Druid and the Spirit Bear.
Assault Cuirass strengthens pushing and fighting through armor auras and attack speed. It synergizes with Spirit Link and True Form’s reduced base attack time.
Moon Shard pushes attack speed to extreme levels. The Spirit Bear can consume it, freeing inventory space while maximizing root chance.
Skill Progression That Fits the Hero
Early levels usually prioritize Summon Spirit Bear and Spirit Link. True Form comes at level six. Savage Roar can be taken earlier when ganks are a threat.
This progression supports early lane strength, sustain, and mid-game durability.
Common Mistakes to Avoid
Losing the Spirit Bear without a plan gives the enemy gold and tempo. Transforming too late exposes Lone Druid during fights. Overchasing causes the bear to become disarmed and useless.
Each mistake comes from losing track of one unit while controlling the other.
A Strong Takeaway
Lone Druid rewards control and patience. Keep the bear alive, manage distance, and decide fights with roots and fear. When both units act as one, Lone Druid in Dota 2 becomes a steady source of pressure that is hard to break.
Welcome to Juked, your premier destination for all things gaming and esports. Stay up to date with Match Schedules, News, and Guides.






0 Comments